How to Remove Gallery from File Explorer on Windows 11, Different Methods
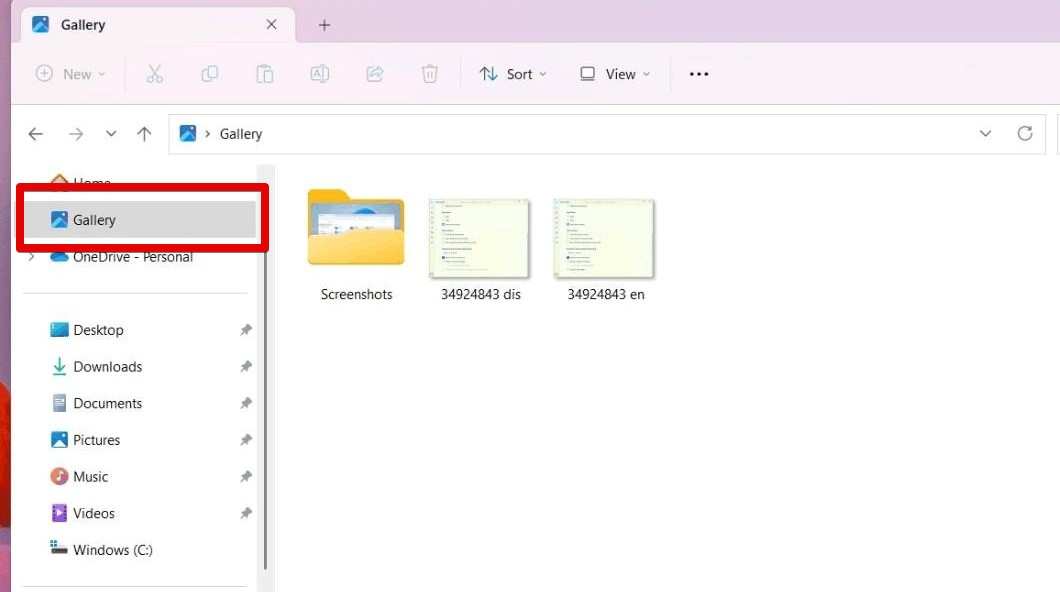
File Explorer was pretty basic on Windows 8 and 10 and users content with it with few little complaints here and there. However, this Windows file manager has a new update that has some significant changes in the program. The KB5030310 Build 22621.2361 is where Gallery has been integrated inside the File Explorer.
The Gallery feature in File Explorer was included in Windows 11 with the intention of giving you a consolidated view of your pictures from several places. Although many users may find this functionality useful, some may find it superfluous or cluttered and would rather utilize a more straightforward File Explorer interface. Thankfully, you can use the Registry Editor or Command Prompt to delete or conceal the Gallery feature in Windows 11. Whether you want to delete the Gallery from File Explorer for all users or simply your own user account, this post will show you how to accomplish so successfully. You may alter File Explorer to better fit your requirements and tastes by following these steps.

What is Gallery in File Explorer on Windows 11?
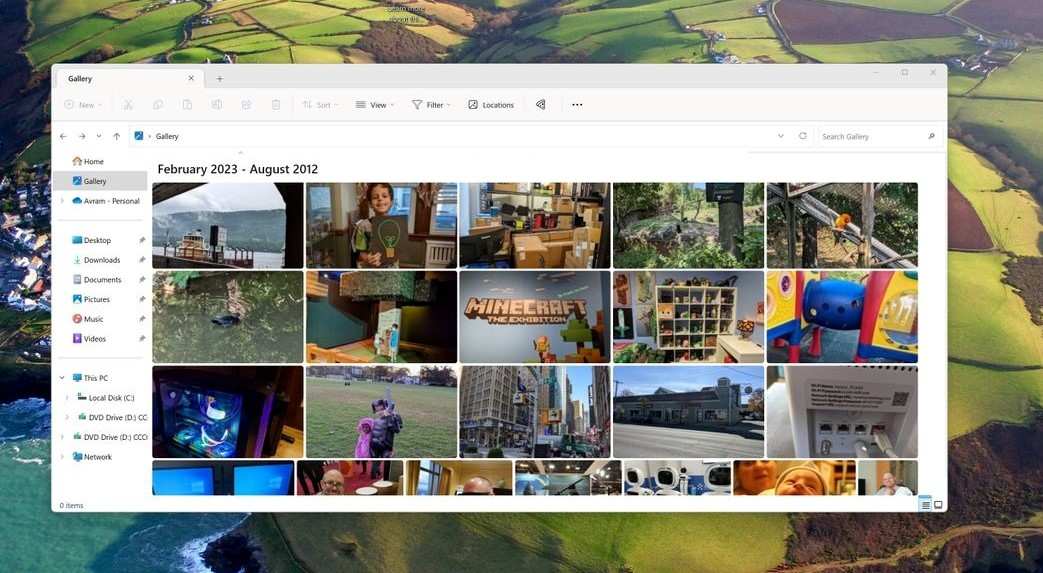
With the Windows 11 Moment 4 Update, a new feature called the Gallery was added to File Explorer. Like the “All Photos” option in the Photos app, it offers a concentrated view of all your photographs. You may set the Gallery to show pictures from other locations in addition to the Pictures folder, which is where it shows pictures by default. Crucially, the Gallery does not copy or relocate your images; rather, it only gathers them from their original sites into a handy dashboard, which facilitates browsing through your complete collection of images in one area.
Difference Between Pictures And Gallery In File Explorer On Windows 11
There’s considerable confusion over the different but related functions of File Explorer’s “Pictures” and “Gallery” sections in Windows 11. When you save or transfer photographs to your computer, the “Pictures” folder is a conventional, dedicated directory where your photos are usually placed, frequently by default. It’s a dedicated space in your user profile that many apps frequently utilize to store and retrieve images.
However, Windows 11 added a more recent feature called “Gallery” that aims to provide you with a more cohesive and dynamic display of your photographs. In contrast to “Pictures,” the Gallery collects photos from several sources, like as OneDrive, other cloud services, and other system files, depending on how you have it configured.

The Gallery may display photographs from a wider range of sources than the Pictures folder, which is limited to what is physically stored there. This could be the reason for the disparity in the quantity of photos between the two. You can more efficiently manage your photo storage if you are aware of this differential.
How To Remove Gallery Section from The File Explorer
Here are all the methods that anyone can apply and get to a File Explorer interface without seeing Gallery.
Method 1: Use Windows Registry
You may use Windows Registry Editor to remove the Gallery feature from File Explorer in Windows 11. Here’s how to do it:
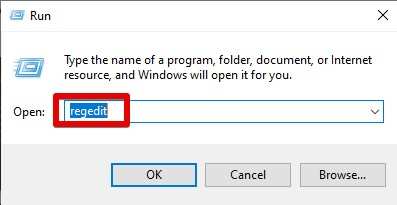
- Open up Run with a quick “Win” + “R” shortcut keys.
- Inside Run, enter “regedit” and click OK to open the Windows Registry. Click the Yes button to confirm the prompt.

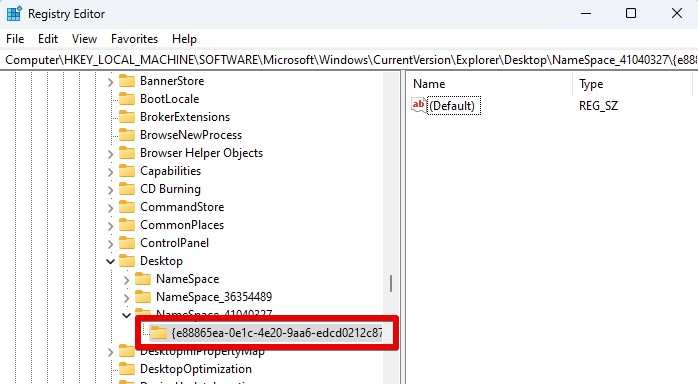
- Go to the path listed below: Computer\HKEY_LOCAL_MACHINE\SOFTWARE\Microsoft\Windows\CurrentVersion\Explorer\Desktop\NameSpace_41040327\{e88865ea-0e1c-4e20-9aa6-edcd0212c87c}

- To delete the key {e88865ea-0e1c-4e20-9aa6-edcd0212c87c}, do a right-click and choose Delete.
By doing this, File Explorer’s Gallery will disappear. Return to the NameSpace_41040327 folder, right-click, select New > Key, and give it the name {e88865ea-0e1c-4e20-9aa6-edcd0212c87c} if you want to restore it. The Gallery functionality will return as a result.
Method 2: Command Prompt
Using Command Prompt, you may disable the Gallery function in Windows 11 File Explorer. Here’s how to do it:
- Click the Search box, type cmd, then choose Run as administrator to launch the elevated Command Prompt.
- Put the following command into the box: reg delete HKLM\SOFTWARE\Microsoft\Windows\CurrentVersion\Explorer\Desktop\NameSpace_41040327\{e88865ea-0e1c-4e20-9aa6-edcd0212c87c}

- To execute the command, press Enter.
By doing this, File Explorer’s Gallery will disappear.
How To Add Folders Inside Gallery
With Windows 11, you can see and arrange your images from several sites in a single, central view by using the Gallery function. You may improve this capability by including more folders in the Gallery, which will make sure that all of your significant photos are within easy reach. To add folders inside the Gallery, follow these steps:
- To access the Gallery, press Windows + E to launch File Explorer and choose it from the pane on the left.
- To access Folder Options, click the See more (three dots) button located at the upper right of the Gallery view, and then choose Manage Locations. This will cause a popup to appear, displaying the folders that are currently part of the Gallery.
- Click on the Add a folder button and choose the directory that you want to add. Click Add this folder to Pictures after selecting the relevant folder. The chosen folder will now be visible in the Gallery, and images from it will be shown among images from other places.
- Managing and accessing all of your images in one location will be simpler after the new folder is added and its contents are shown in the Gallery view.
This procedure keeps your photo library navigable and orderly.
How To Remove Folders Inside Gallery
It’s simple to remove folders from Windows 11’s Gallery, which lets you arrange the images more neatly. This is how you do it:
- To access the Gallery, press Windows + E to launch File Explorer and choose it from the pane on the left.
- Select Manage Locations after clicking the See more (three dots) symbol in the upper right corner. This will show every folder that is presently part of the Gallery.
- Find the folder you wish to delete in the Manage Locations box. After you click on it, choose Remove this folder. The Gallery view will not display the folder.
This procedure aids in maintaining the Gallery’s emphasis on your favorite folders.
How To Hide Gallery From File Explorer
Using the Registry Editor, you may make the Gallery feature in File Explorer invisible to all users on your Windows 11 machine if that’s more your style. To hide the Gallery, take these actions:
- Press Windows + S to bring up the Search window. Search for regedit and open the first result. By doing this, the Registry Editor will open. To approve modifications, click Yes when prompted.
- Locate and open the Gallery Key. Navigate to the following location in the Registry Editor: HKEY_LOCAL_MACHINE\SOFTWARE\Microsoft\Windows\CurrentVersion\Explorer\Desktop\NameSpace_41040327
- Click on NameSpace_41040327 and hit find the key {e88865ea-0e1c-4e20-9aa6-edcd0212c87c}.
- Right-click on the key and choose Delete to remove the Gallery configuration from the file manager.
- Launch the File manager again and the Gallery function will now be disabled from File Explorer.
By doing so, the Gallery is effectively hidden from view, making the File Explorer interface simpler. You may add the key again by following the same procedures and making a new key with the same name if you desire to restore the Gallery at a later time.
Restore Gallery Entry
You may use the Registry Editor to reinstate the Gallery for all users on your Windows 11 machine if you deleted it from File Explorer in the past. Take these actions:
- Shut off every File Explorer window.
- Enter regedit again using the methods shown above and you will open up the Registry.
- Go to: HKEY_LOCAL_MACHINE\SOFTWARE\Microsoft\Windows\CurrentVersion\Explorer\Desktop\NameSpace_41040327
- Choose “New” > “Key” from the menu when you right-click on NameSpace_41040327 in the left pane. Enter {e88865ea-0e1c-4e20-9aa6-edcd0212c87c} as the new key’s name.
- Double-click the “(Default)” value in the right pane, and change its data to {e88865ea-0e1c-4e20-9aa6-edcd0212c87c}.
All users will see the Gallery again in the navigation window when they reopen File Explorer.
Conclusion
In Windows 11, removing the Gallery feature from File Explorer is a simple procedure that can be completed using the Registry Editor or Command Prompt. Whether you want a more minimalistic interface or prefer the good old pictures tab to view your pictures, You may implement the methods above to run things your own way. You may successfully conceal or remove the Gallery for your user account or for all users on the system by following the instructions provided. Restoring the Gallery is as easy if you decide to change your mind at any point, keeping your configuration adaptable and customized to meet your requirements.
