How To Block Ads On Android Using Private DNS in 2024
We all live in a world where advertisements are a constant presence on our electronic devices. They can be found in games, browsers, and even some operating system apps with a lot of bloatware. Over the years, Android OEMs have reduced the amount of bloatware in their system but they are still prominent in today’s time. These commercials can be bothersome and invasive and the more unpleasant thing is that they are hard to completely remove.
Fortunately, it is possible to completely avoid advertisements on Android devices by using Private DNS. Using a good ad blocker made for Android is also very way of removing the ads. Here, we offer a thorough tutorial on using Private DNS to block Android ads in addition to a deep dive into the world of DNS and its workings.
What is DNS?
During the olden days, we used phonebooks to store contact numbers of family and friends. The DNS or Domain Name Server serves what the phonebook does but for the online world. The phonebook or DNS stores websites and they can be accessed via domain names rather than complex numerical IP addresses.
When you type a domain name like “nytimes.com” or “espn.com” into your web browser, DNS translates this human-friendly name into a machine-friendly IP address, such as 192.168.1.1 for IPv4 or more complex alphanumeric addresses like 2400:cb00:2048:1::c629:d7a2 for IPv6. While it is arguably easy for us to remember names, computers find it difficult to know every website there is on the internet. As a result, they use IP addresses to communicate with each other over the network.
Each Internet-connected device, be it a server, smartphone, or personal computer, has its own IP address. By using this address instead of a street address, data can be sent to the right place. Because DNS servers eliminate the need for users to commit these IP addresses to memory, they play a crucial role. Rather, users need only rely on well-known domain names, as DNS handles the translation for them.
How Is DNS Operated?
To translate a hostname that is easy to use, such as www.example.com, into an IP address that computers can use to find the desired Internet resource, a process known as DNS resolution must be carried out. There is no need for user involvement beyond entering the domain name into the web browser; this process is quick and easy.
- DNS Query Initiation
When you send a query, your browser contacts DNS via IP address. After that, It starts the domain name resolution process by sending out a DNS query.
- Recursive Resolver
A DNS resolver, sometimes referred to as a recursive resolver, receives the query initially.
Serving as a bridge between the user’s device and the DNS system, this resolver is normally offered by the user’s Internet Service Provider (ISP).
- Root Name Servers
The servers receive the query which, the recursive resolver sends in case of missing IP cache. The process of converting a domain name into an IP address begins with these servers.
- TLD Name Servers
Based on the domain extension (e.g. ,.com,.org,.net), the root server returns the address of a Top-Level Domain (TLD). After that, a suitable TLD name server receives the query sent earlier.
- Authoritative Name Servers
For a given domain, the TLD server points the resolver towards authoritative name servers. The IP address and other domain records are stored on these servers.
- IP Address Retrieval
To expedite the resolution process, the recursive resolver caches the IP address that is associated with a domain name, which it receives from the authoritative name server.
- Browser Access
Lastly, the user’s browser receives the IP address from the recursive resolver and can use it to access the requested website.
How To Block Ads on Android Using Private DNS?
On smartphones, ads can be a constant annoyance that interferes with your browsing and use up important data. Thankfully, Private DNS is a built-in feature that you can configure to effectively block ads on Android 9 Pie and later versions. This technique improves your online security and privacy while being simple to use. To use Private DNS to disable ads, follow these steps.
Required conditions:
Make sure Android 9 Pie or later is installed on the device that requires Ads removal. Depending on the manufacturer and software version of your device, the steps and options listed may change slightly, but the general procedure stays the same.
Easy-to-follow Instructions
- Open Settings
To begin, open the app drawer on your device and select the “Settings” icon. The settings page will appear and this is where you start the procedure.
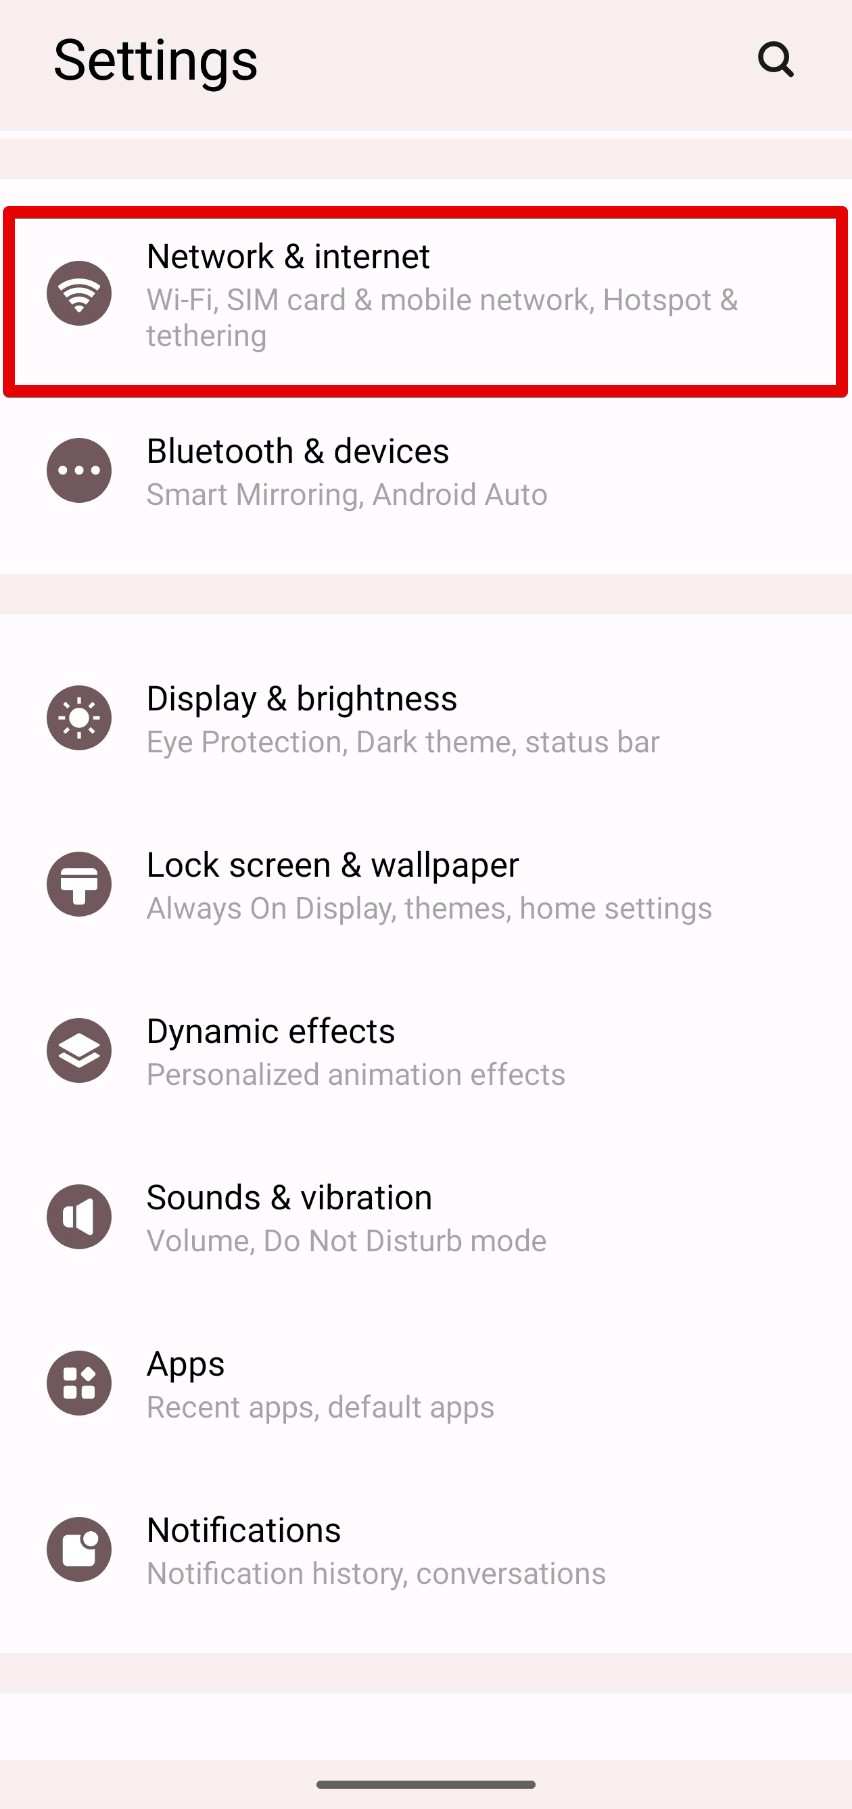
- Open the Network & Internet page
Search for the “Network & Internet” or “Wireless & Networks” option in the settings menu. Although the precise wording may differ depending on the device, it is usually found close to the top of the settings list.
- Obtain Private DNS Configuration
Scroll down to the “Network & Internet” section and choose “Private DNS.” You can set up a custom DNS provider and configure DNS settings with this option.
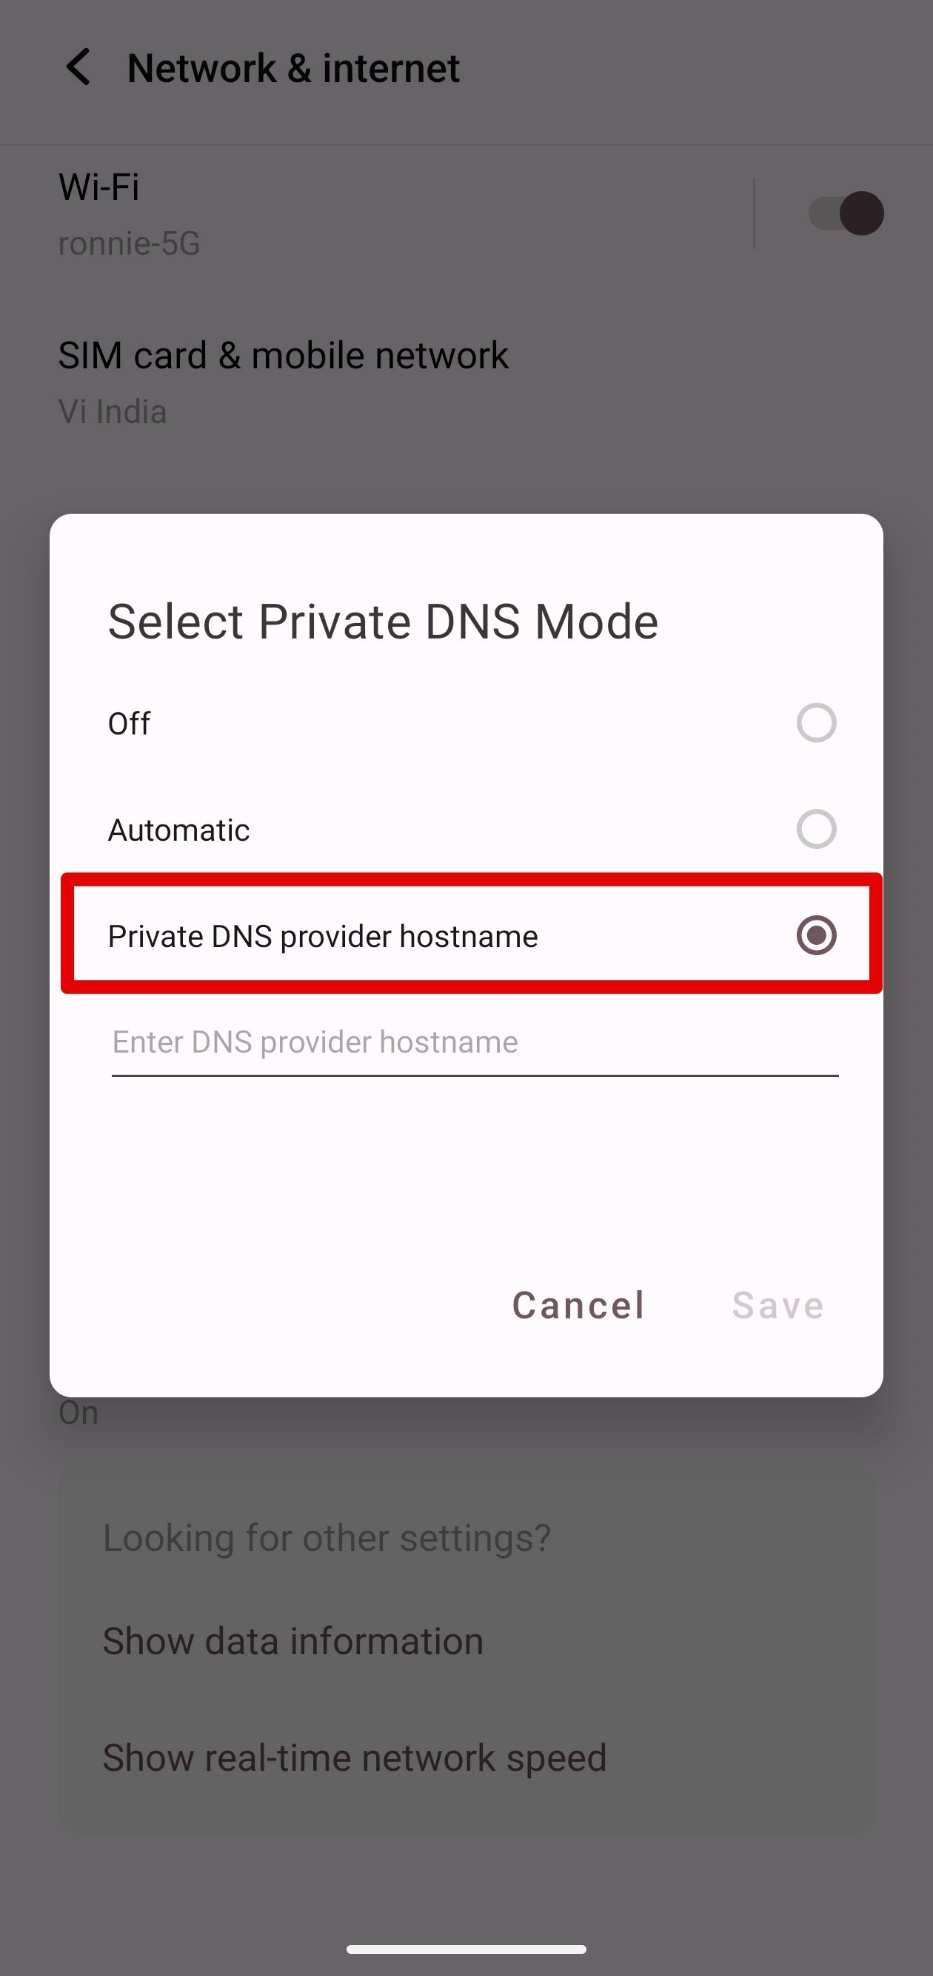
- Set Up Your Own DNS
Choose the “Private DNS provider hostname” option or any other name that is related to manually letting you configure private DNS. This will cause a dialog to appear where you can choose a different DNS provider.
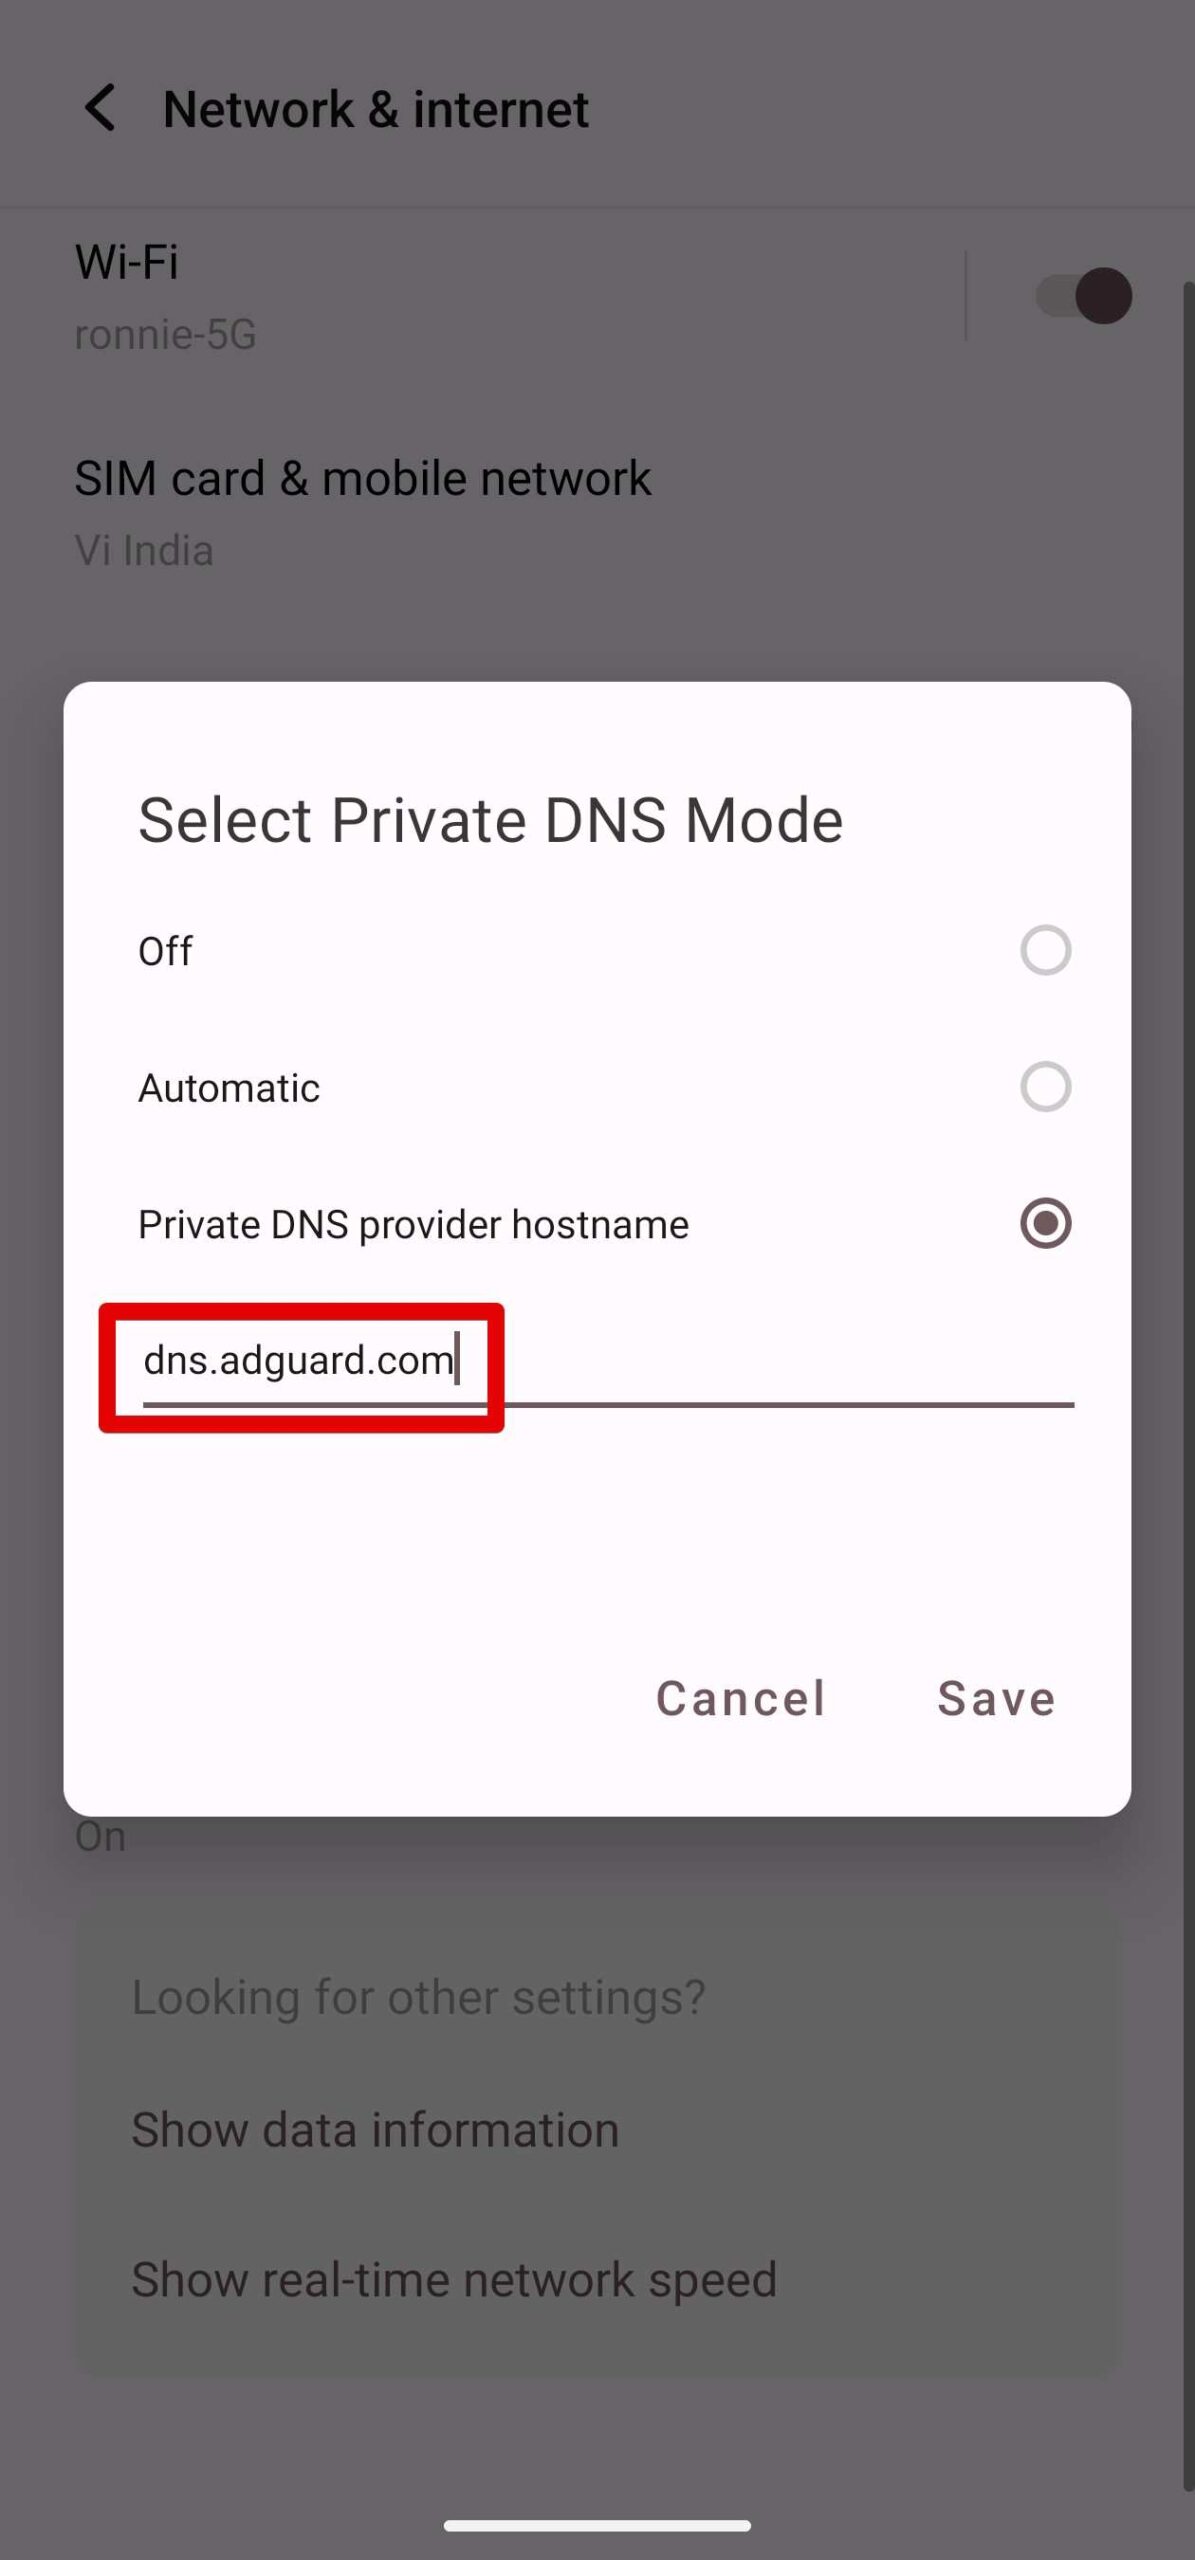
- Put the hostname
In the resulting dialog box, enter the hostname “dns.adguard.com”. Reputable DNS provider AdGuard blocks advertisements at the DNS level, keeping them from ever getting to your device.
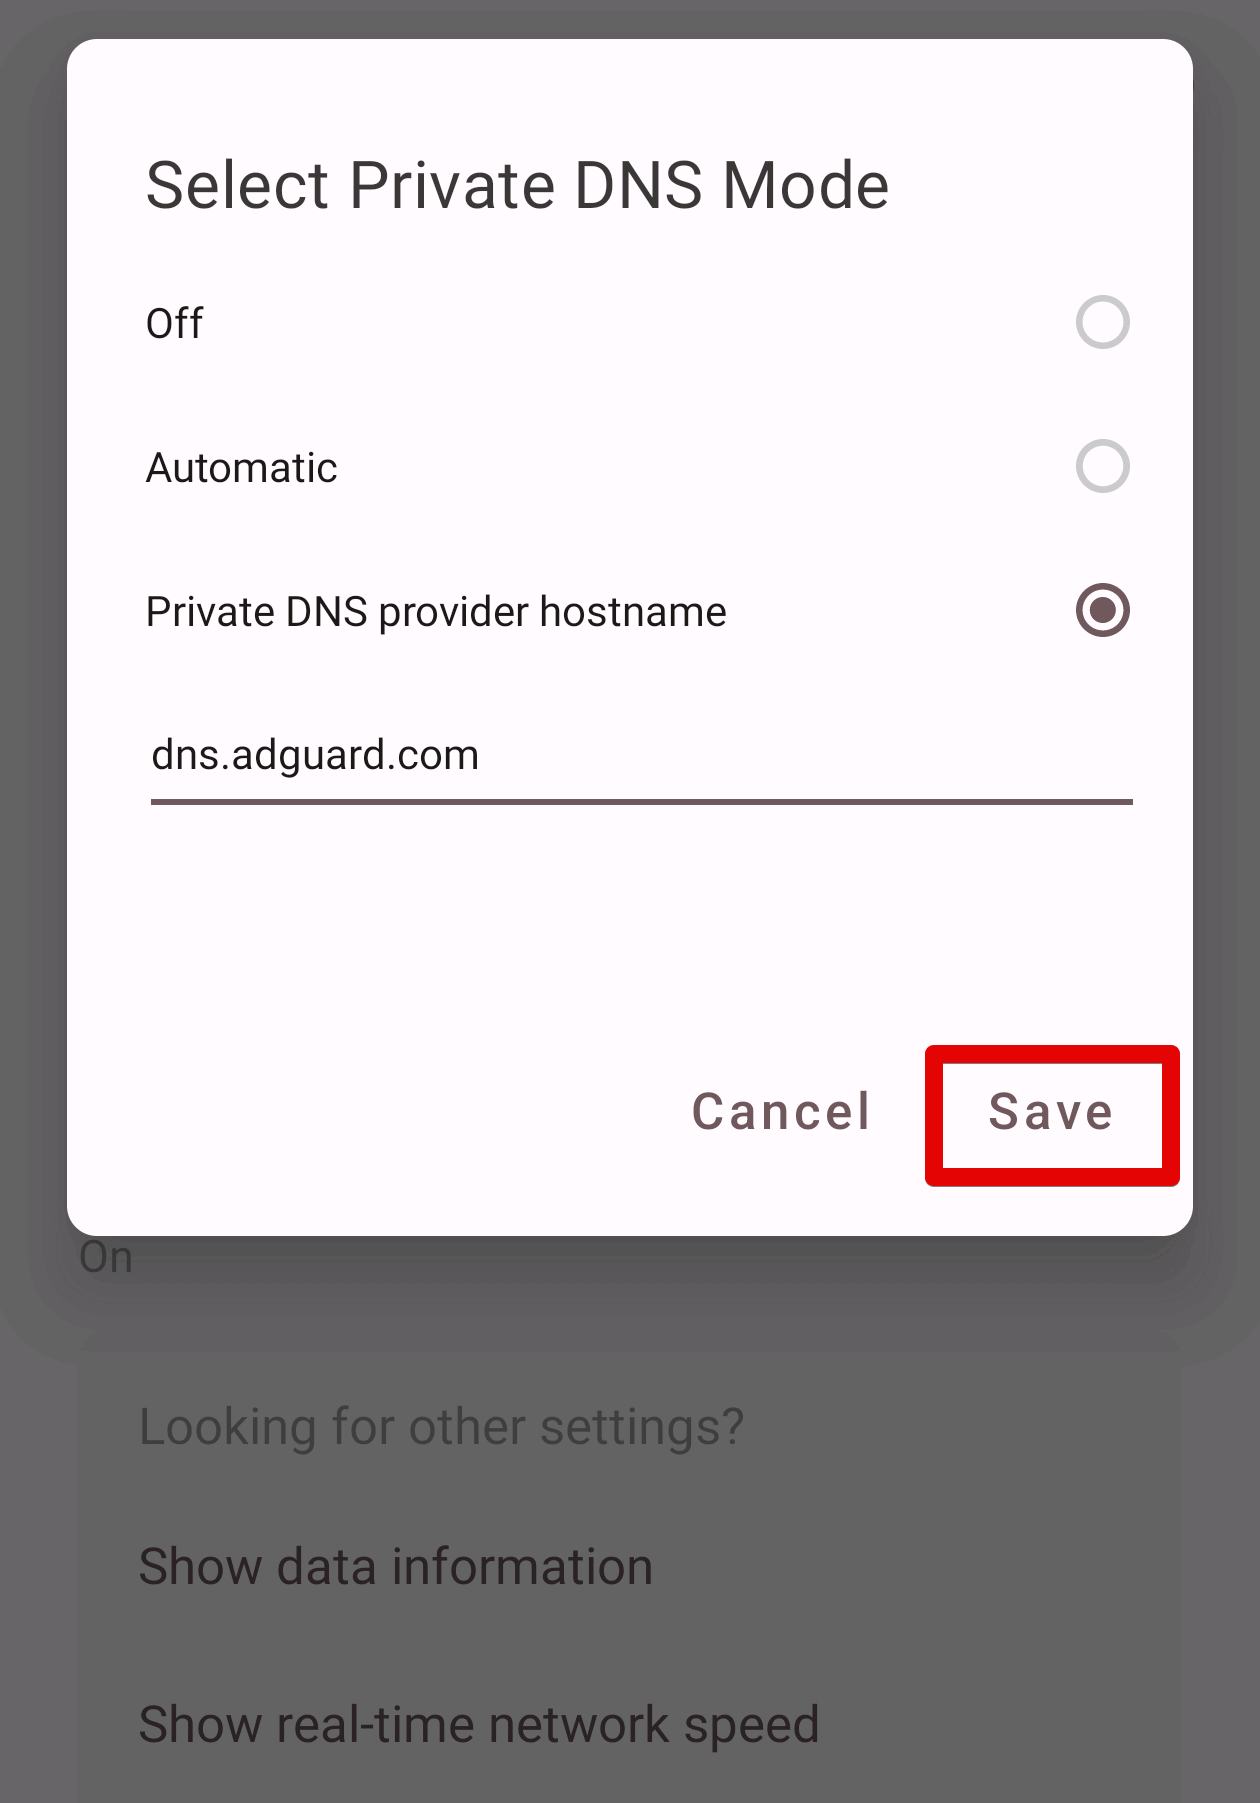
- Save Preferences
To save your changes after entering the hostname, tap “Save” or “OK.” This will save the settings permanently until you change it back.

- Launch the Chrome browser
Next, start your device’s Chrome browser. To make sure that ads are blocked successfully in Chrome, you need to make a few more settings adjustments.
- Open Chrome Flags
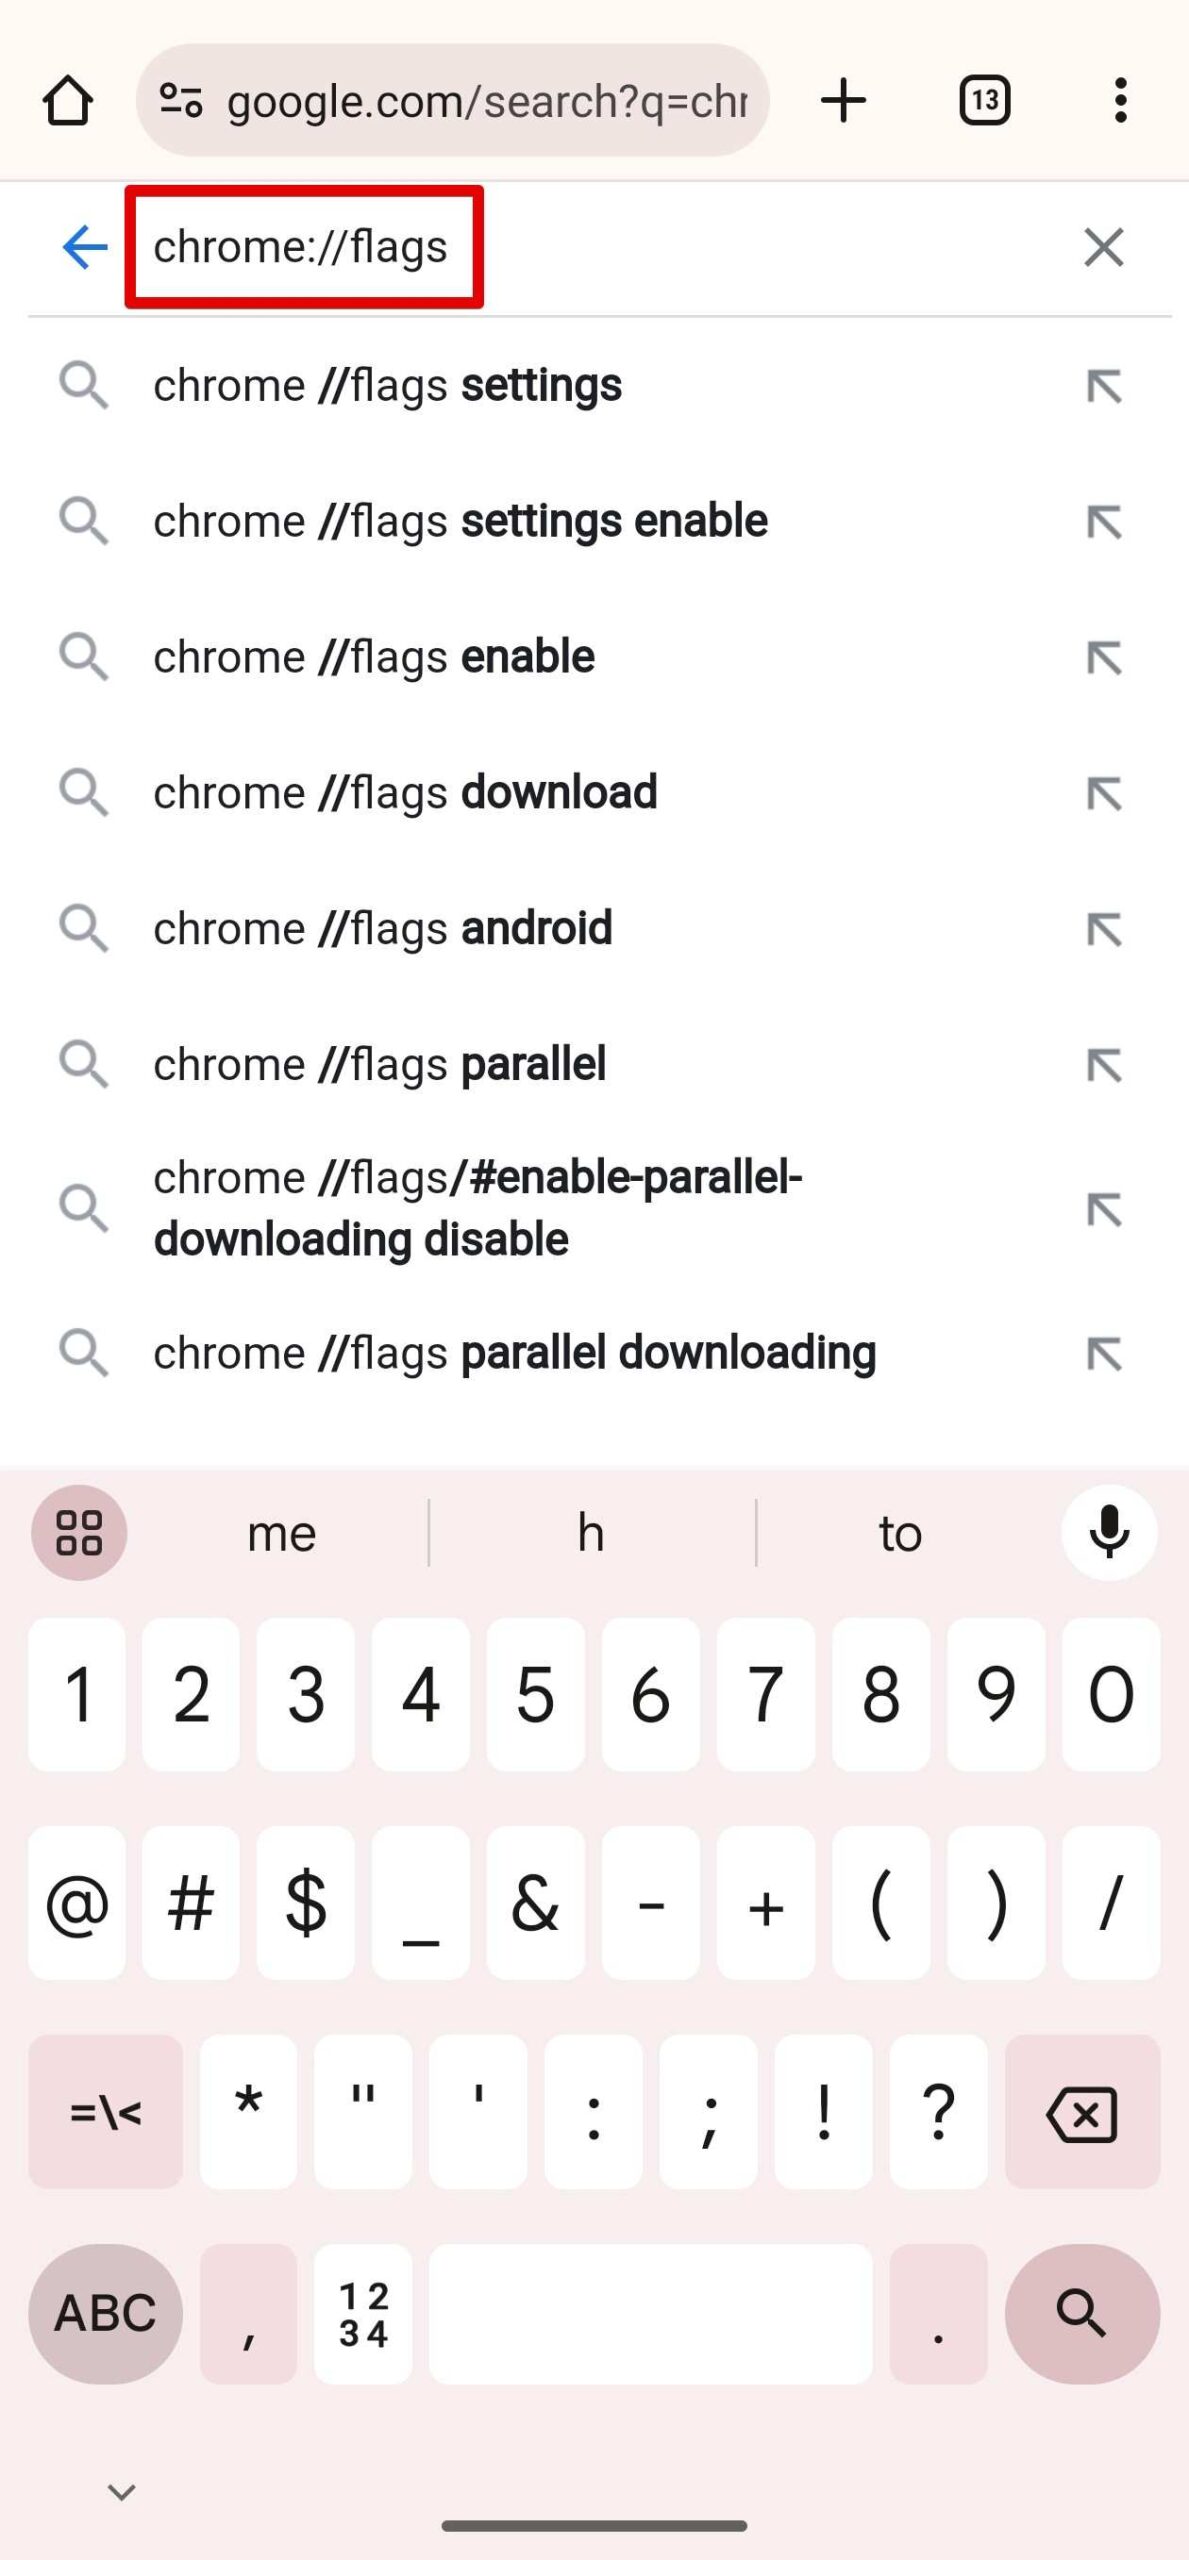
Enter “chrome://flags” as shown in the Chrome browser and search for it. This will redirect you to the experimental features page for Chrome.
- Turn off Async DNS
Use the top search bar on the Chrome flags page to look up “DNS.” Find the “Async DNS” option and turn it off. By completing this step, you can make sure that Chrome uses your previously configured DNS settings instead of its built-in asynchronous DNS resolver.
- Empty the DNS Cache
Enter chrome://net-internals into the URL bar and press Enter to make the changes take effect. This will launch the network internals page in Chrome.
- Empty Cache
Select the “Clear Cache” button after selecting the “DNS” tab from the left-hand menu. By doing this, Chrome’s DNS cache will be cleared, requiring it to use the newly set Private DNS.
- Restart Chrome
In order to make sure all of the changes take effect, close and restart the Chrome browser. Chrome will use the Private DNS settings to block advertisements when it reopens.
Block Ads with an Android App
There are certainly many Android apps for blocking your Ads through DNS apps. However, to inform you on a somewhat basic level we will take an example of one app and demonstrate its use case. You can use any app of your choice and the procedure to block an ad will be more or less similar.
A DNS switch is a robust system-wide ad block with Public DNS server options. To remove all unwanted ads on your Android system, follow the steps below.
- You can get the “DNS Switch” app from the Google Play Store.
- Launch the app, then select “OK” to continue.
- As you navigate through the DNS presets, pick “AdGuard1” and “AdGuard2.”
- There will be a notification asking for approval before establishing a VPN connection. Click “Allow” to give consent.
With this configuration, you can browse without advertisements on your device by blocking ads across the board using AdGuard’s DNS servers.
Conclusion
Domain name server is like a bridge that keeps our internet intact. There is no entangling of servers and IP addresses due to the set protocols that create an environment that we can browse without any issue. Advertisements are a part of the internet and they will be there forever, however, we have the tools to choose whether we want tons of ads shoved to our face or not. There are already many Android devices with little to no ads in their operating system, but apps and games still have those. As a result, a quick tweaking of your private DNS can solve such problems and let you utilize your Androids more optimally.
