9 Ways to Enable Memory Integrity on Windows 11 Devices
The main purpose of the Memory Integrity feature on Windows 11 is to safeguard your system from potential malware. There are many types of malicious threats that can come from anywhere within your computer or through the internet. If you have not been facing any compatibility issues with your hardware then chances are that memory integrity is enabled. However, some users get an error prompt regarding the disability of memory integrity. So in this guide, we will show 9 amazing and useful ways to run memory integration on Windows 11.
What is Memory Integrity?
Windows 10 and 11 come with a security feature called Memory Integrity that helps shield your computer from harmful threats. Critical components of the operating system are placed in a safe environment thanks to virtualization technology. Memory Integrity, when enabled, makes it more difficult for hackers to exploit vulnerabilities or introduce malicious code by confirming that the essential components of Windows have not been changed. It is important to verify compatibility before enabling this function, as it depends on compatible hardware and may impact certain applications or device drivers. All things considered, Memory Integrity gives your Windows system an extra degree of protection.
Fix 1: Use Windows Security to enable Memory Integrity
It’s easy to improve your system’s security by turning on Memory Integrity under Windows Security. To activate this feature, take these actions:
- Click the Start button and search for “Windows Security” in the search field. From the list of search results, choose the most suitable program in accordance with what you are searching for.
- To access Device Security, choose the “Device Security” option in the Windows Security program.
- Select the “Core isolation details” link located under the same name.
- Click once on the “Memory Integrity” option to enable the same.
- Restart your gadget: To make the adjustments take effect, restart your device.
You may fortify your system’s defenses against attacks that try to take advantage of memory vulnerabilities by turning on Memory Integrity. By blocking hostile code from accessing high-security processes, this feature guarantees increased security.
Fix 2: Review Incompatible Drivers
Drivers in your computer require updates for them to communicate with your hardware. Any issue that arises within the drivers due to corrupt drivers or outdated drivers, can cause memory integrity issues. This is why reviewing the published names of such drivers is important.
Before activating Memory Integrity, evaluate incompatible drivers by doing the following steps:
- Utilize Windows + R to launch Run.
- To launch Windows Defender, type windowsdefender: and hit Enter.
- Select Device Security by clicking.
- Hit on Core isolation information under the same name.
- Select Memory Integrity > Review incompatible drivers.
- Take note of the incompatible drivers’ Published Name (with a.inf extension) or Product name.
Windows does not advise uninstalling these drivers, therefore updating them should fix compatibility concerns. Here’s the way to do so:
- Head to “Device Manager” by searching for it in your Windows.
- Inside the manager, go to the “view” tab and follow through with “Devices by driver”. This will sort out all your devices according to their driver.
- Take a good look at the driver name and try looking for any incompatibility in the published names. If you find any, you can update it from the manufacturer’s site.
Fix 3: Scan Your Computer for Malware
Use Windows Security to perform a malware scan on your computer by doing the following steps:
- In the search field, type Windows Security after clicking the Start button.
- Select the Windows Security program.
- Click Virus & Threat Protection in the app.
- Select Scan options by clicking.
- Choose “Full scan” and press “Scan now.”
- To finish the scan, adhere to the directions displayed on the screen.
- Give your machine a restart.
By identifying and eliminating any malware infestations, this comprehensive scan may be able to fix problems like the Memory Integrity being switched off error.
Fix 4: Uninstall the Application with an Incompatible Driver
Use these procedures to remove a program that uses an incompatible driver:
- Utilize Windows + R to initiate the Run dialog box.
- To launch the Programs and Features box, type “appwiz.cpl” and hit Enter.
- Determine which application is incompatible with the driver.
- After choosing the program, select Uninstall.
- Do as what the directions on the screen tell you to do.
- To get rid of any lingering cache files, restart your computer.
Check to see if you can activate Memory Integrity after rebooting.
You may get rid of the faulty driver from your system by uninstalling the application.
Fix 5: Update Your System
To upgrade your system, do the following:
- You may launch the Run dialog box by pressing Windows + R.
- To launch the Programs and Features box, type “appwiz.cpl” and press Enter.
- Determine which program is utilizing an incompatible driver and choose it.
- To finish the uninstalling procedure, click Uninstall and proceed with the directions.
- To remove any last-minute software cache files, restart your computer.
Open Settings from the Start menu once you’ve rebooted.
Select Update & Security and then click the Updates button.
If asked, restart your computer and install any updates that are available.
Maintaining system updates guarantees security and compatibility.
Fix 6: Enable Virtualization Technology in BIOS
To activate Virtualization Technology in the BIOS, take the following actions:
- To start, turn on your computer again.
- Press the BIOS key (such as F2, F10, F12, or Delete) that corresponds to the manufacturer of your device during startup.
- Locate the Virtualization or Intel VT-x option in the BIOS menu. Usually, it is under the Processor, or System Configuration tabs.
- Turn on the Intel VT-x or virtualization option.
- Save the changes, then go. After making your adjustments, leave BIOS.
- Typically, to do this, press F10.
- Restart your gadget: Let your device restart in order to finish the procedure.
The Memory Integrity function in Windows Security performs best when Virtualization Technology is enabled.
Fix 7: Enable Memory Integrity using Registry
Use the Windows Registry to activate Memory Integrity by doing the following steps:
- Backup the Registry: Make a backup of the registry keys to a file on your computer before making any changes.
- Launch the Registry Editor: To open the regedit.exe file, press Windows + R, then hit Enter.
- Go to the Key by navigating here: Access HKEY_LOCAL_MACHINE\SYSTEM\CurrentControlSet\Control\DeviceGuard\Scenarios\HypervisorEnforcedCodeIntegrity by browsing through it.
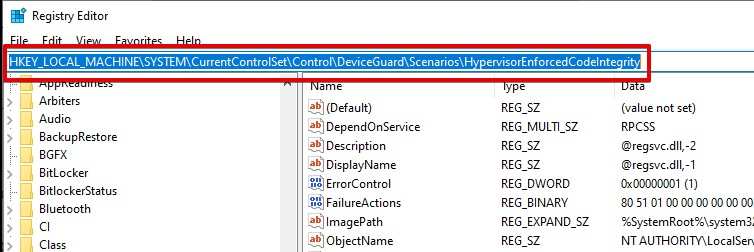
- Change the Value: To set the value of the Enabled key from 0 to 1, double-click on it.
- Implement Modifications: To exit the Registry Editor, click OK.
- Restart your computer: Give your gadget a restart.
- Check Windows Security by going to: Check to see if Memory Integrity is enabled under Core Isolation by opening the Windows Security program.
For increased system security, this technique makes sure Memory Integrity is turned on.
Fix 8: Enable memory integrity using the Local Group Policy Editor
Use the Local Group Policy Editor on Windows 11 Pro or Enterprise to activate memory integrity by doing the following steps:
- Launch the Editor for Local Group Policies: To open policy editor, enter Windows + R, and type “gpedit.msc” and hit Enter.
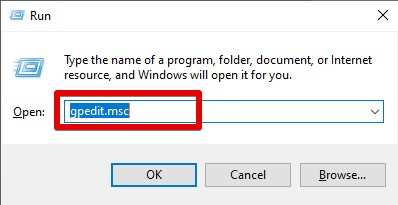
- Go to Device Guard by clicking here. Navigate to System > Device Guard under Computer Configuration > Administrative Templates.
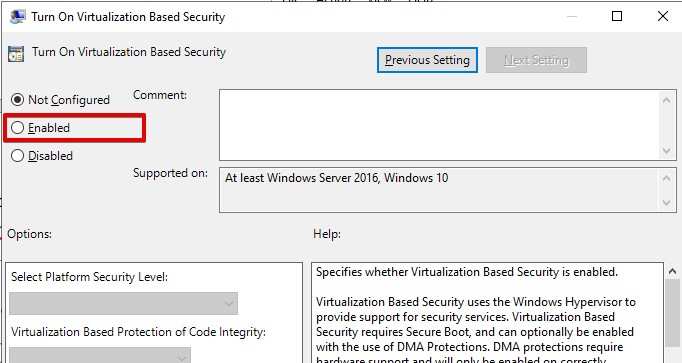
- Activate Security Based on Virtualization: Toggle on Virtualization Based Security by double-clicking.
- Establish Configuration: Choose “Enabled.” From the drop-down selection under Virtualization Based Protection of Code Integrity, choose Enabled with UEFI lock.

- Implement Modifications: To save, click Apply and OK.
Restart your computer: In order to enable memory integrity, restart your device.
This ensures enhanced security by enabling memory integrity in Windows Security.
Fix 9: Create a GPO to enable Memory Integrity.
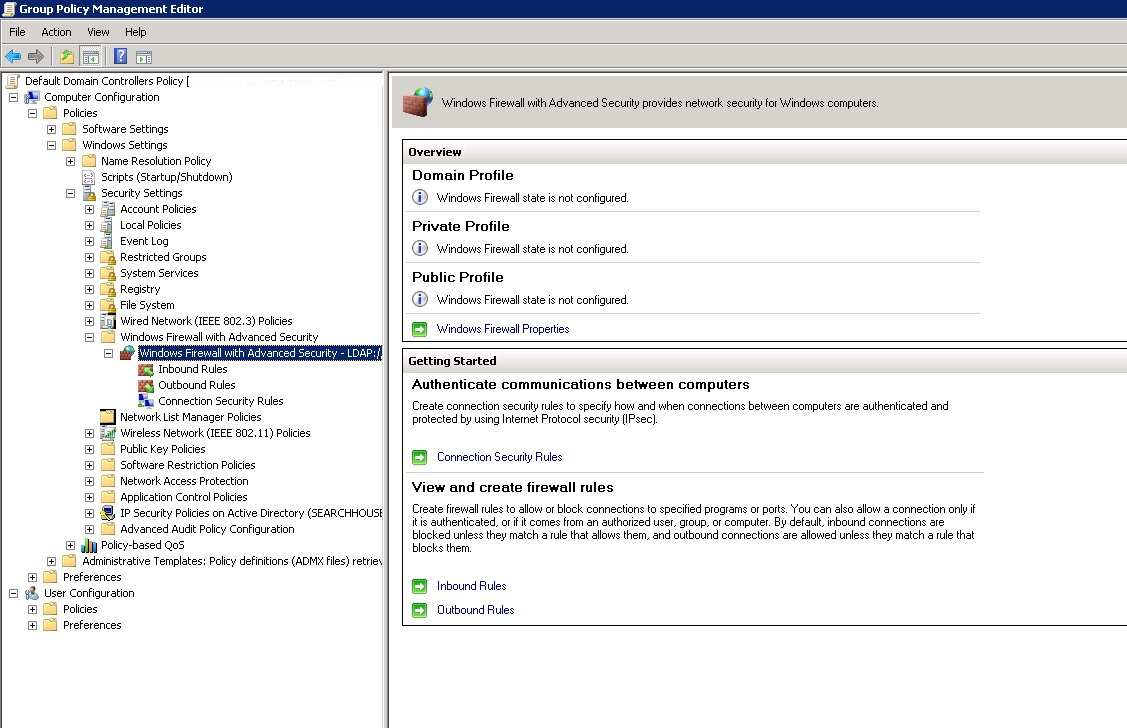
For this method, you need to download GPMC first. Use Group Policy to activate Memory Integrity on Windows 11 by doing the following steps:
- Launch Group Policy Management Console from the Start menu.
- To create a new Group Policy Object (GPO), expand the “Domain” option and select Group Policy Objects.
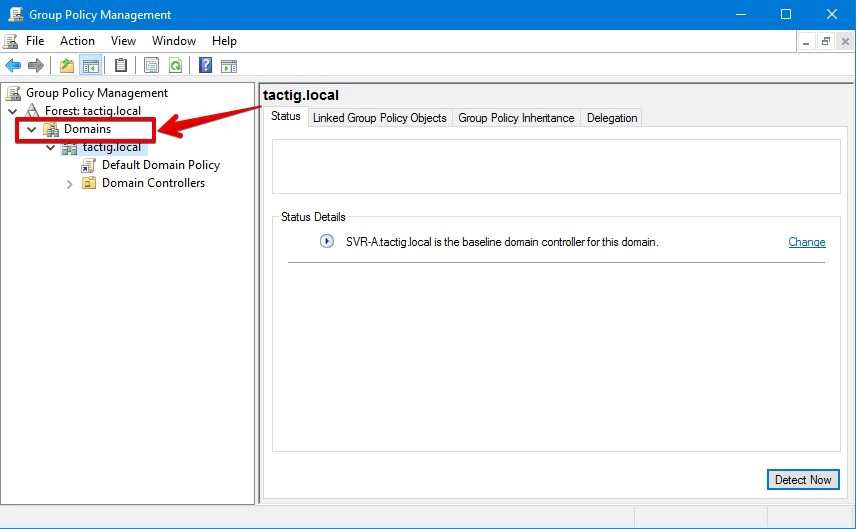
- A new GPO window will open where you have to create its name and select Source Starter. For example, put the name “enable memory Integrity” and click “OK”.
- Now right-click on the “Enable Memory Integrity” option you just created.
- Select “edit”.
- Go to System > Device Guard under Computer Configuration > Administrative Templates.
- Toggle Virtualization-Based Security by right-clicking and choosing Edit.
- Select “Enabled.”
- Now, from the drop-down selection under Virtualization Based Protection of Code Integrity, choose “Enable with UEFI lock”. Click “Apply” and “OK.”
If it hasn’t been done earlier, link the GPO to the appropriate OU. By ensuring that Memory Integrity is enabled, this procedure improves security on all Windows devices in your company.
Conclusion
Just like any other issue Windows possesses with its never-ending list of faults, this one can be solved. Most of the fixes can be implemented on the go and it will take a few minutes to correct the memory integrity problem. Other fixes require you to download one or two tools that help in running the Memory Integrity of Windows 11.
